
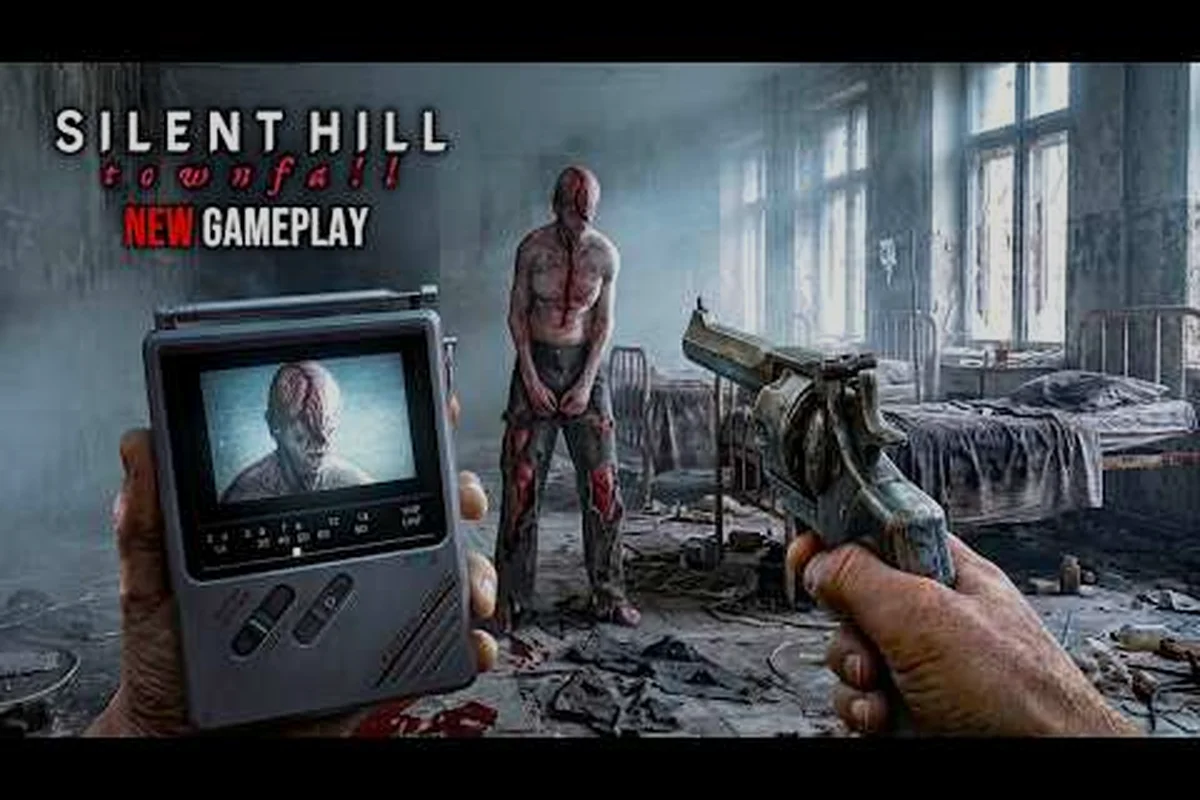
St. Amelia is a small, fictional Scottish North Sea fishing island swallowed by fog, and finding your bearings there is half the survival puzzle in SILENT HILL: Townfall. The in-game diegetic map is intentionally vague, so most players leave Simon Ordell's first hour more turned-around than when they started. This area guide walks every street, dock, hallway, and rooftop on St. Amelia, calling out locked doors, CRTV save points, and the rooms you cannot unlock until the third act.
St. Amelia Island Overview: The Shape of the Fog
Before drilling into individual blocks, it helps to picture the island as a rough fish-hook shape. The harbor and ferry terminal anchor the southern tip, a steep main road climbs north through the residential terraces, the town center sits on a plateau roughly in the middle, and the cliffs and lighthouse crown the northern headland. Fog density ramps up as you move inland, which means a Silent Hill Townfall island map is most useful in the southern coastal areas and least useful once you push into the upper town.
| Zone | Approximate Position | Typical Fog Density | Save Points |
|---|---|---|---|
| Ferry Terminal & Docks | South tip | Light to medium | Phone near gangway |
| Pier Row & Fish Market | South-coast strip | Medium | Phone by the gutting tables |
| Lower Residential | West slope | Medium to heavy | Phone at the launderette |
| Town Center & High Street | Central plateau | Heavy | Phone outside the pub |
| St. Amelia General Hospital | North-central | Heavy (indoors thick) | Bench at reception |
| Cliffs & Lighthouse | North headland | Constant whiteout | None |
The island fits in roughly a six-minute walk end to end, but the winding lanes and staircases stretch real travel time well beyond that. The St. Amelia map fragment you can pick up in the Pier Row phone booth pins the southern half to the wall, while the second fragment found in the High Street newsagent fills in the upper town and hospital approach.
The Diegetic Map System
Simon carries no HUD minimap. Instead, physical map fragments exist as in-world items you pin to a corkboard in the back of his car, and public payphones act as soft save points. According to the SILENT HILL: Townfall on Steam listing, this diegetic UI replaces a traditional overlay so that every glance at the map is a deliberate action, which keeps tension high when fog rolls in.
| Map Fragment | Location | Areas Revealed |
|---|---|---|
| Fragment 1: Harbor Sheet | Pier Row phone booth | Ferry Terminal, Docks, Fish Market |
| Fragment 2: Town Sheet | High Street newsagent | Town Center, Lower Residential, Hospital Approach |
| Fragment 3: Cliffs Sheet | Lighthouse keeper's desk | Cliffs, Lighthouse, Hidden Grotto |
| Note: stitched on the car corkboard | N/A | All three sheets combine into a complete island map |
Players who skip picking up the Town Sheet from the High Street newsagent frequently report getting lost in the alleyways for twenty minutes or more, since Fragment 2 unlocks the Town Center, Lower Residential, and Hospital Approach regions all at once — and those areas are exactly the cluster you traverse before pushing north toward the Cliffs Sheet. Grabbing it before any of those streets is the single biggest time save available in the opening act of the Silent Hill Townfall map, because every fog-encounter spawn in the residential loop is gated behind visibility of those tiles, and without them the corkboard stays half-empty until you backtrack past the payphone.
Southern St. Amelia: Ferry Terminal, Docks, and Pier Row
The southern half of the island is where most players spend their first hour, and it carries the heaviest "newcomer" density across the Silent Hill Townfall map. Fog rolls in patchy along the Ferry Terminal approach, harbor lamps cast a warm sodium glow over Pier Row, and the diegetic map picked up from the Docks kiosk is most legible here because the streets run in a clean grid parallel to the wharf. That grid layout means three of the five St. Amelia map waypoints (Ferry Gate, Fishmonger Lane, and the South Pier lantern) sit within a roughly 90-meter walking corridor, letting new arrivals clear early objectives without backtracking through the fog wall that gates the northern districts.
Ferry Terminal
The ferry from the mainland deposits Simon on a metal gangway next to a row of rusted bollards. Two payphones flank the terminal building; only the left-hand unit works, and it doubles as the first save point. A locked chain-link gate blocks the fuel depot to the east, and a heavy steel door at the rear of the terminal opens only after you find the brass key on the gutting table in the Fish Market.
| Notable Item | Location | Use |
|---|---|---|
| Brass Key | Gutting table, Fish Market | Opens terminal rear door (puzzle path to Chapter 2) |
| First CRTV Tuning Note | Bench seat, terminal waiting room | Teaches frequency scanning |
| Map Fragment 1 | Pier Row phone booth | Reveals southern half of the island map |
Pier Row and Fish Market
Pier Row is a raised boardwalk that curves past shuttered smokehouses and stacks of polystyrene boxes. The Fish Market occupies a long, open-sided shed with concrete floors and fluorescent tubes that flicker whenever a monster is nearby. This is one of the first places where the CRTV pocket television earns its keep, because silhouettes of prowling creatures appear when you tune to specific static frequencies. Community testing on the early build suggests that scanning frequency 87.3 FM in the Fish Market reliably reveals the Lying Figure equivalent lurking behind the ice counter.
Lower Residential and the Launderette
A narrow lane climbs from Pier Row into the Lower Residential terraces. The launderette is the district's de facto hub: a front loading door, a working payphone out front, and a back room with a working sink that refills Simon's empty bottle. The launderette also acts as a soft hub because every locked side door leads to a short alley that loops back onto the main lane, so getting cornered here is rare as long as you keep moving toward the phone.
Central St. Amelia: Town Center, High Street, and Alleyways
The middle of the island is where the Silent Hill Townfall map becomes essential navigation rather than a casual glance. In Central St. Amelia, the Town Center, High Street, and the surrounding Alleyways braid into overlapping loops that look identical in the fog, so a missed doorway on Sanders Street often forces a full loop back through Finnegan's Alley and past the Centennial Diner. Veterans recommend pinning landmarks like the kiosk clock and the Reeves Hardware awning, because the compass drift bug around the High Street junction can rotate your marker 15–20° off true north. Without that reference, backtracking through alleys can easily cost five real-world minutes per missed turn.
High Street and the Newsagent
High Street runs east-west along the central plateau. The newsagent near the corner of Bell Lane is the single most important pickup in this zone because it contains Map Fragment 2, which is the only diegetic reference to the hospital approach and the cliffs path. A red British-style post box stands outside the newsagent and acts as a landmark, since it is the only painted red object in town and shows up even through heavy fog.
| Landmark | Approximate Coordinates (diegetic grid) | Why It Matters |
|---|---|---|
| Red Post Box | C-3 | Reference point for map Fragment 2 |
| The Drowned Anchor (pub) | C-2 | Save phone, CRTV hint on the bar |
| St. Amelia Cinema | C-4 | Locked until Act 2, side quest with Zoe |
| Bell Lane Alley | C-3 to D-3 | Fast travel between High Street and Lower Residential |
Town Square and the Empty Fountain
The town square is a flagstone plaza dominated by a dry stone fountain. The fountain's basin hides a small hatch that leads to a maintenance tunnel under High Street, which is a critical shortcut once unlocked. The plaza is also one of the first places where the "other world" shift occurs, and the skybox will visibly darken for roughly ninety seconds when you collect the square's key story item.
The official SILENT HILL: Townfall page on the PlayStation Store confirms that Simon returns to the town square multiple times across the story, so memorizing the fountain's position pays off across chapters rather than just the first visit.
Alleyways and Back Lanes
Bell Lane, the Cut, and Saltire Wynd are the three named alleyways off the main streets. They are tight, littered with broken bottles, and home to most of the game's most aggressive enemies, which is why the CRTV's silhouette mode is the recommended navigation tool here. Players who want a quieter path between High Street and the hospital approach can hug the western retaining wall and use the Cut as a covered route, although the Lying Figure equivalent spawn rate is higher in that lane than in the open streets.
Northern St. Amelia: Hospital, Cliffs, and Lighthouse
The northern third of the island is the most disorienting stretch of any Silent Hill Townfall area guide, because the hospital interior is a maze of identical beige corridors and the cliffs beyond are pure whiteout for most of the chapter.
St. Amelia General Hospital
The hospital sits on a low rise north of the town center. The exterior has only one accessible entrance, a covered ambulance bay that doubles as a melee tutorial zone. Inside, the layout is a tight rectangle with two wings: the East Wing (wards and nurses' station) and the West Wing (administrative, Zoe's contact room, and the morgue). The reception bench is the closest thing to a save point, and the CRTV must be tuned to the morgue frequency to even access the lower floor.
| Hospital Wing | Key Rooms | Notable Items |
|---|---|---|
| East Wing | Wards 1-4, Nurses' Station, Utility Closet | Syringe (throwable), medical file lore note |
| West Wing | Administration, Zoe's Room, Morgue, Generator | Late-game revolver, hospital keycard |
| Lower Floor | Cold storage, boiler room, hidden tunnel to cliffs | Map Fragment 3 trigger, story cutscene |
Zoe Ellis, the nurse contacting Simon via the CRTV, is playable in select West Wing sections according to community reports, and her smaller hitbox makes tight corridors more manageable for stealth. Players interested in a deeper walkthrough of the hospital layout can compare notes with the chapter-by-chapter area guide to see which rooms are skippable on a first run.
Cliffs and the Lighthouse Path
The hospital's hidden tunnel exits onto a narrow cliff path that runs along the northern headland. Fog here is essentially constant, so the Silent Hill Townfall island map Fragment 3 you collect from the lighthouse keeper's desk is what makes this zone navigable. The path forks at a stone cairn: the left fork drops to a sea cave (optional lore area), while the right fork climbs to the lighthouse itself.
The lighthouse is the final story location for Simon in the main campaign. There is no save point inside, so players should reload at the cliff cairn before pushing on. A final CRTV frequency scan inside the lantern room reveals the silhouette of the game's signature pursuer, and engaging it on a second playthrough with the late-game revolver is the recommended approach because melee weapons break on its armored head.
Navigation Tips and Hidden Areas
Even with all three map fragments, a few tricks make the Silent Hill Townfall map much easier to use in practice. These are the tips the community has surfaced after the September 2026 launch, and they are especially useful during the trickier backtracking sections in Acts 2 and 3.
-
Pin every diegetic map fragment to the car corkboard as soon as you find it; reading them on the floor only shows a single sheet at a time.
-
Payphones regenerate their save state after each chapter transition, so backtracking to the nearest phone is always safer than opening the inventory in a monster-heavy room.
-
The CRTV silhouette mode highlights monsters through walls up to about 15 meters, so use it in alleys before committing to a route.
-
Bottle throws attract creatures and are most useful as a distraction when backtracking through Pier Row with full health.
-
Hiding in cupboards is a viable stealth option, but only in the residential zones; hospital corridors and cliff paths are too linear for hiding to work.
Hidden Areas Worth Knowing
A few St. Amelia areas do not appear on the standard diegetic map, which is part of why an external Silent Hill Townfall area guide is useful. The following are confirmed by community data and reviewer playthroughs but are not documented in the in-game UI.
| Hidden Area | How to Access | Reward |
|---|---|---|
| Sea Cave under the cliffs | Left fork at the cliff cairn | Lore note, throwable bottle cache |
| Cinema basement | Rear fire escape, High Street | Optional Zoe side quest trigger |
| Fish Market cold room | Breakable glass behind ice counter | Map Fragment 1, lore audio log |
| Maintenance tunnel | Hatch under town square fountain | Fast travel shortcut, save phone |
| Hospital morgue lower floor | CRTV frequency 92.4 FM | Revolver, hospital keycard |
Players who clear all five hidden St. Amelia areas should also cross-reference the collectibles hub, since two of the off-map zones — the Sea Cave and Fish Market cold room — gate unique Map Fragments and audio logs that the standard diegetic map never flags, and missing them locks out the full journal entry required for the lighthouse ascent ending.
Recommended Exploration Order
For a first playthrough, the order below keeps the Silent Hill Townfall map readable by routing you through the Ferry Terminal tutorial, Pier Row, and Lower Residential before the riskier Town Center, St. Amelia Hospital, and Cliffs and Lighthouse segments, so you collect both map fragments and the revolver before locked-off zones force backtracking through high-threat monster spawns.
| Order | Area | Approximate Time | Notes |
|---|---|---|---|
| 1 | Ferry Terminal | 10-15 min | Tutorial area, save here |
| 2 | Pier Row / Fish Market | 30-40 min | First map fragment, CRTV tutorial |
| 3 | Lower Residential / Launderette | 25-30 min | Refill bottles, soft save point |
| 4 | Town Center / High Street | 45-60 min | Second map fragment, alley stealth practice |
| 5 | St. Amelia Hospital | 60-75 min | First revolver access, Zoe segments |
| 6 | Cliffs and Lighthouse | 30-45 min | Final boss, no save point |
Progression and Multi-Ending Considerations
A Silent Hill Townfall St Amelia map is also useful for tracking which endings you have unlocked, because each ending requires a different set of areas to be explored. The base "Reconciliation" ending is reachable by completing all six zones in the order above, while the "Drowned" and "Ascent" endings require side content in the cinema basement and the sea cave respectively. Multiple-endings support is confirmed on the Steam product page, and players report that the cinema basement trigger must be completed before the lighthouse final cutscene for the Drowned ending to register.
The screenshot below is representative of the kind of area overview the diegetic map fragments build toward once all three sheets are pinned to the corkboard. Players wanting real-world context for the Scottish North Sea setting can also read the St. Amelia island location breakdown, which covers the historical inspiration for the hospital, the lighthouse, and the ferry terminal.
| Ending | Required Areas | Trigger Condition |
|---|---|---|
| Reconciliation | All six main zones | Standard lighthouse ascent |
| Drowned | All six + cinema basement | Zoe's side quest completed before final cutscene |
| Ascent | All six + sea cave | Lore note collected in hidden grotto |
Frequently Asked Questions
How many areas does the Silent Hill Townfall map cover?
The diegetic map is split into three fragments covering the southern docks, the central town, and the northern cliffs. Once all three are pinned to the car corkboard, they combine to reveal every St. Amelia area Simon can walk through, including the ferry terminal, Pier Row, Lower Residential, the town center, the hospital, and the lighthouse.
Where do I find the first map fragment in St. Amelia?
Map Fragment 1 is inside the Pier Row phone booth, on a small shelf below the handset. You can pick it up after the first save phone activates, and it is the only sheet that clearly labels the ferry terminal and fish market.
Is there a Silent Hill Townfall area guide for the hospital layout?
The hospital is a two-wing rectangle with a hidden lower floor accessed by tuning the CRTV to 92.4 FM in the West Wing morgue. Zoe's contact room sits at the end of the West Wing corridor and is the recommended reference point because the reception bench, the morgue, and the boiler room all branch off from it.
Can I fast travel between St. Amelia locations?
There is no open-world fast travel, but the maintenance tunnel under the town square fountain acts as a shortcut between High Street and the hospital approach once unlocked. Using this tunnel avoids the longest backtrack in the game and is the single biggest time save for repeat playthroughs.
Does the Silent Hill Townfall island map change between playthroughs?
The diegetic map layout stays the same, but enemy spawn points, fog density, and the locations of lore notes are randomized on New Game+ according to community testing. The three map fragments always spawn in the same phone booth, newsagent, and lighthouse desk, so navigation is consistent even on harder runs.